Using the Lobby (for Hosts)

The lobby is where online participants can see tables on screen, see where other members are “seated”, and join or leave a video-conference session with others freely by clicking on any table. Online participants can be moved in or out of the lobby at any time during the event by a greeter or host. Online participants cannot go into the lobby on their own, a Greeter or Host must change the state of the event first. If a user joins an event while the event is in lobby mode, they will join the lobby.
Just like the live stream event, if you have made your event public, anyone who clicks on your event link will be able to join, see the tables, and see members moving between tables when you have switched into the lobby mode. However, an online participant cannot join a table until they sign up or log in. If they click on a table to join, they will be prompted with a dialogue to sign up or log in.
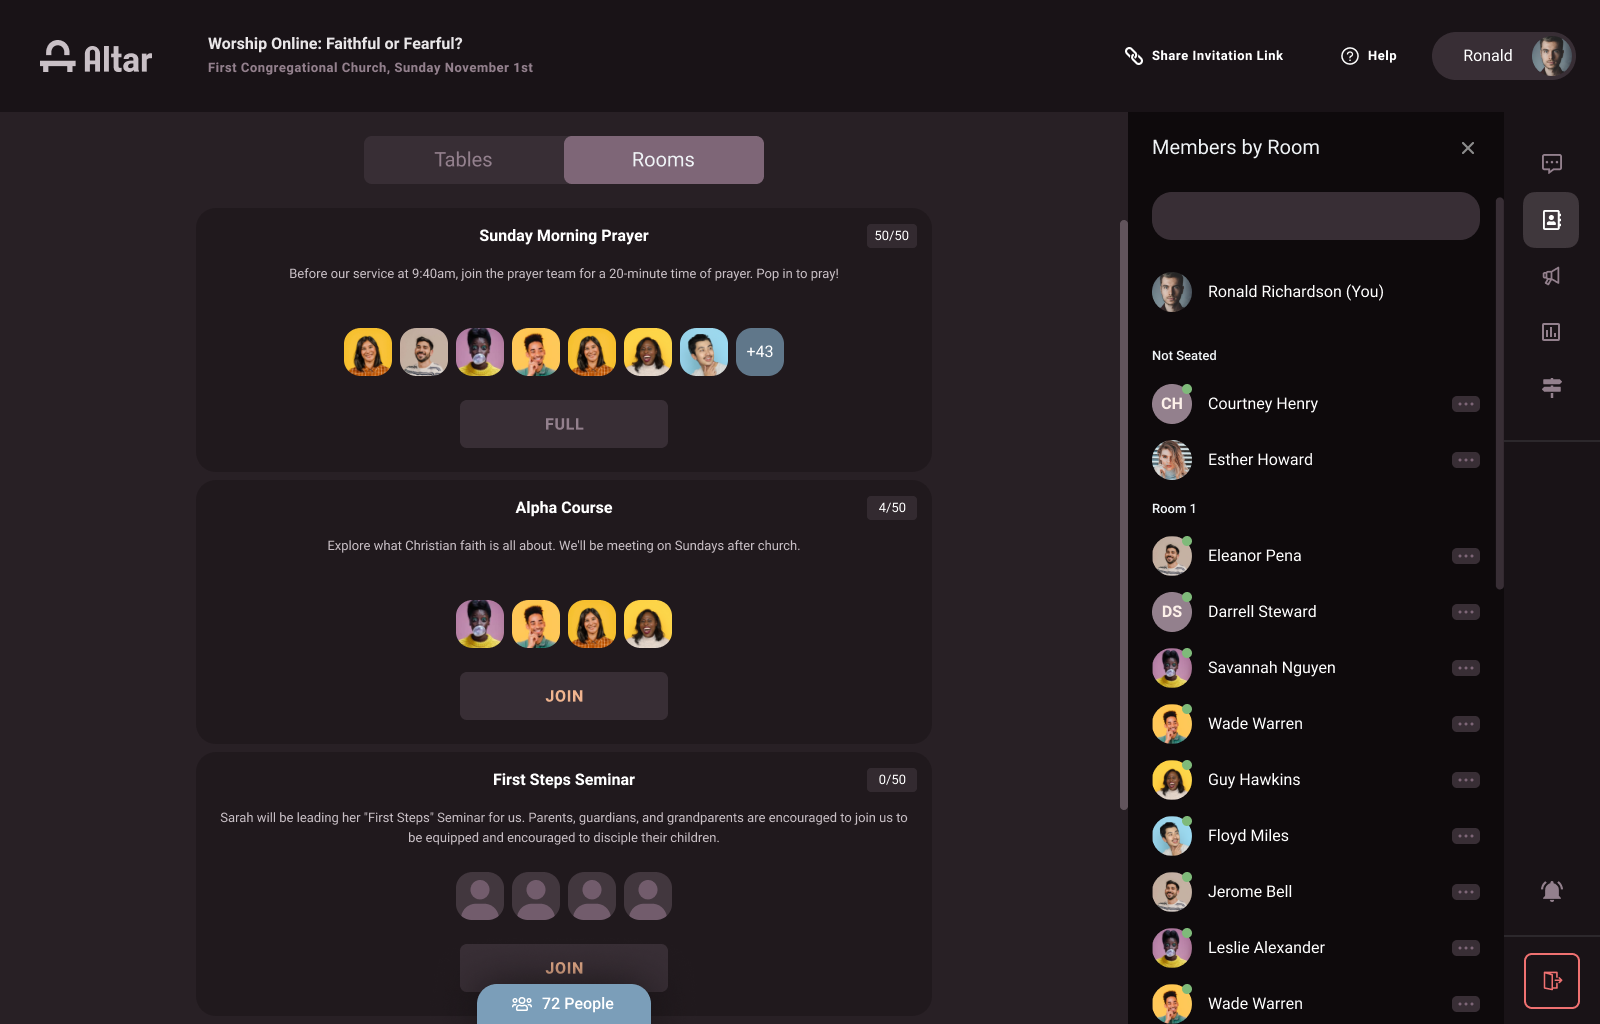
All attendees can access Rooms when the Event is in the Lobby state. Attendees can toggle between Tables and Rooms to be able to move around. You can see who has joined which Rooms, and hop in and out of Rooms, just like Tables.
Here are all the actions online participants can currently do in the lobby:
Actions anonymous participants (people who are not logged in) can do while in the lobby:
Actions logged-in participants can do while in the lobby:
Actions the greeter and/or host can do while in the lobby:
A greeter or host can change the state of the event from the live stream event to the lobby at any time and move all online participants, both logged-in and anonymous participants, into the table view. You can move online participants back to the live event from the lobby at any time as well. Learn more about event timing to learn how to use the lobby in your services and events.
Step 1: Join an event as a greeter and/or host.
Step 2: Click the Host options drop-down menu and then choose Move Everyone To Lobby option from the drop-down menu. If you decide to move everyone back to the event, all you need is to click on Move everyone back to the event button from the Host options.
Note: If you move everyone into the lobby from the live stream event, online participants in watch parties remain in the same group but are seated together at a table. They can leave the table to see the lobby view.
Note: If a user joins an event while the event is in lobby mode, they will join the lobby.

Step 5: Click Yes from the pop-up. Click Cancel if you change your mind.

Step 6: When the Host clicks the "Move Everyone to Lobby" button, all participants will see a 10-second countdown notification appear: "The Host will move everyone to Lobby in 00:10"

Step 7: When the 10-second countdown timer ends, all online participants are moved to the Lobby and get a notification banner that says the Host has moved everyone to Lobby.
Step 8: If you have added Rooms to your event, you can toggle between the Tables and Rooms view.

Step 9: Click on the Join button to enter a Room.

Step 10: As a Host, when you want to move everyone back to the Auditorium, click on Host Options and select Move Everyone Back to Event.

Step 1: Join an event as a greeter and/or host.
Step 2: Click the Host options drop-down menu and then choose Move Everyone To Room View option from the drop-down menu. If you decide to move everyone back to the event, all you need is to click on Move everyone back to the event button from the Host options.

Step 3: Now you can allow your attendees to choose which Rooms to join or direct them to a specific Room.

Step 1: Join an event as a greeter and/or host.
Step 2: Click the Host options drop-down menu and then choose Move Everyone To Specific Room option from the drop-down menu. If you decide to move everyone back to the event, all you need is to click on Move everyone back to the event button from the Host options.
Note: Anonymous users cannot be moved into a specific room.

Step 3: Select which Room you would like to move all the attendees into by selecting the button and then clicking apply.

Hosts and greeters can name tables in the lobby from the lobby screen. These labels can be added before the service or when everyone is moved to the lobby.
Step 1: From the lobby, hover over the number on the table you'd like to rename until it highlights. Then click on the number.

Step 2: Type the new table name into the box and click save.

Step 3: When you are finished naming tables, you can remain in the lobby or move back into the event.

Learn how to create an account, join an event, and other community member functions.
Learn how to create an account, join an event, and other community member functions.
Learn how to create an account, join an event, and other community member functions.